The previous post covered how to create a Google Analytics account, but there are several things we should do to configure the account before we even log out, or add the tracking code to our site. Because we made a Google account separate from any personal or other business accounts to create the Analytics account, the first thing we need to do is give the Google account you are usually logged into anyway access.
This will save you having to log in or out of your main account when you want to look at your analytics. If you have several websites, or manage the sites of several clients, this is a lifesaver. It’s also the procedure you use to give consultants, clients, employees, and so on, access to your account.
Adding Users to Google Analytics
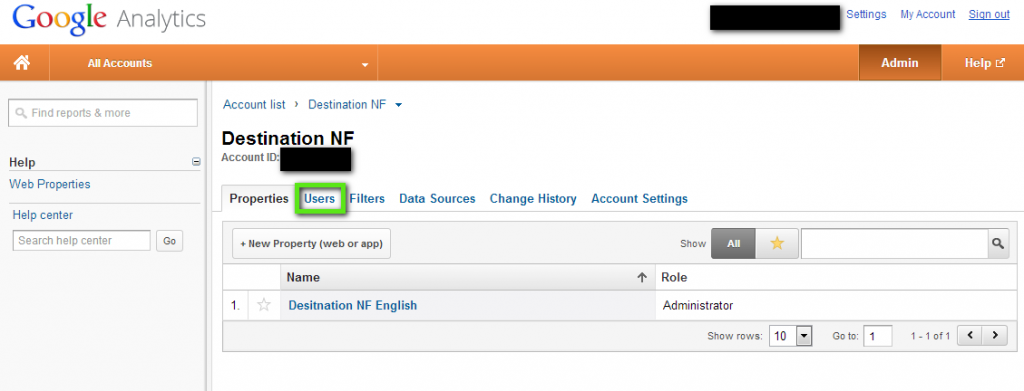
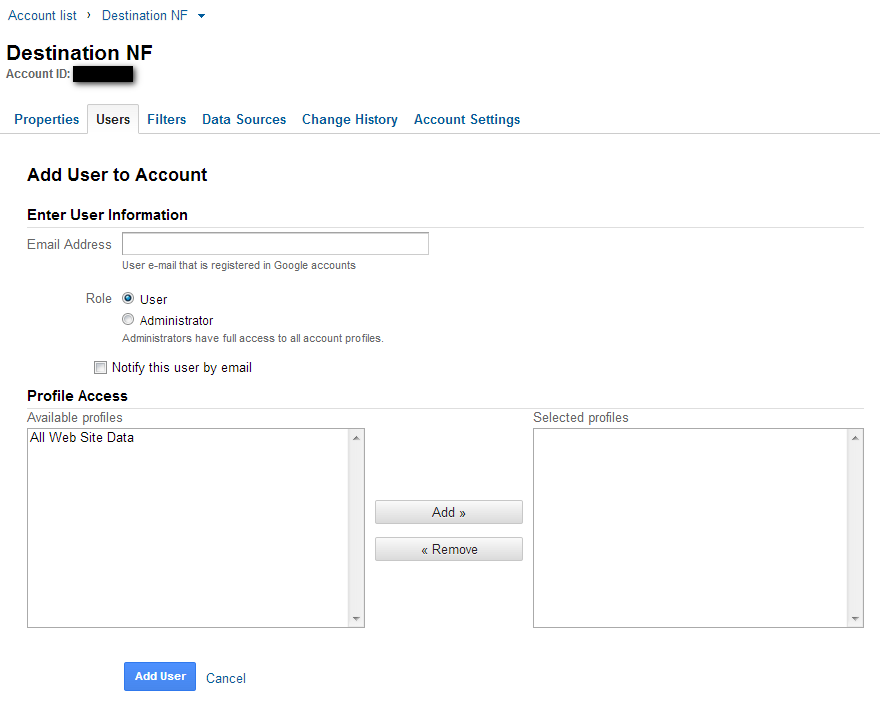
If you’ve come right from the last post, click the account name at the top of the page, just under the orange menu bar, directly to the right of where it says Account List. If not, click the home button at the top left, then the Admin at the top right, then the name of the account. Once you’re on the screen pictured above, click the Users tab I’ve highlighted in green. The Users Tab will have a New User button, just below the tab itself. Now click it to get to the screen shown below.
This is pretty straightforward: enter the Google registered email you want to give access to, decide if they need Admin or User privileges, and if they need to be notified by email. If you are giving someone user privileges, you can restrict which profiles they have access to. When you click the Admin radio button, the profile selection area disappears. You don’t have that control with Admins because Admins can see all the profiles in an account. That is why we go to the trouble of making a separate account for each business.
Don’t forget to click Add User at the bottom when you are done. Eventually you get in the habit of scrolling down to look for these buttons any time you do things in tools made by Google. You can make sure everything worked by checking under the Users tab for the emails of the people you are adding.
Adding a Master Profile
Google Analytics (GA for short) comes set up with one profile that collects all the data it can. Eventually, you or another user will want to filter the data. Filters are one of the most powerful features in GA, and they are used to modify data in all kind of situations. But like anything that is powerful, filters can get pretty complicated, and the outcomes of using them aren’t always what one anticipated. Beyond this, data that gets filtered out can never be recovered.
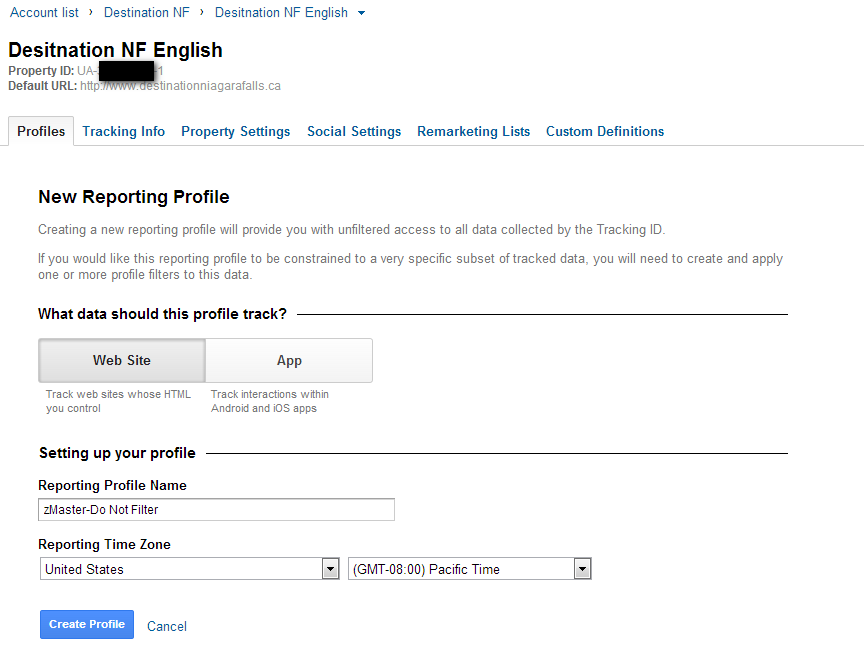
As in many other technology applications, the smart thing to do is have a back-up: a set of data that has everything, and that no one ever puts a filter on. Ever. And if you do it while you are already logged in it could take under a minute. Click the home button at the left of the orange menu bar, then the Admin button at the right of said bar. Now click the account name we want to work on from the list, then the property name from the next list. You should be in the Profiles tab for the website we want to make a back-up for. Click the New Profile button.
This is again, pretty straightforward (it’s not unusual that GA makes something harder to find than it is to actually do once you find it). Profile names like Master, Back up, All Data, or so on, will be immediately recognizable to frequent Analytics users, who will know not to filter them. We can guard a bit against someone given Admin access getting a bit too ambitious by explicitly including Do Not Filter in the profile name. I go one step further and prefix the name with a “z” so that it will show up last in lists.
You’re Done! Kind of…
There are still a couple or three things that you’ll have to do before you’ve done good job of basic Google Analytics setup. Most importantly, you need to get the tracking code up on your site. Then you can integrate your GA account with Google Webmaster Tools and get information about your how people find your site in Google search.


Leave a Reply