Webmaster Tools is a phenomenally useful and free diagnostic suite that no website should be without. In addition to telling you a lot about your website, it’s the only shot you have at getting information about how Google sees your website. It integrates easily with Google Analytics, which is also free and incredibly useful. I’ve found the easiest way to set up Google Webmaster Tools (WMT) is to first set up Google Analytics (GA), which we’ve discussed in preceding articles.
Google WMT Account Creation
We used a dedicated Google Account to set up Analytics to a make sure we could later control and transfer access to the data and settings. Because Webmaster Tools stores similar data and settings, and the goal is to integrate the two tools, we’re going to use the same email we made for GA to set up WMT. Make sure you are logged in under it before going to, or log in under it when asked by, the WMT homepage www.google.com/webmasters/tools/
The first step is pretty straight-forward: enter the website’s address. The only thing to note here is that Webmaster Tools thinks that the www and non-www versions of your site are two totally different things, so type in the one that you usually go by and click the button to continue. Ideally, you have a redirect on your website so that people can only get to one version, and you can use that one. We can use WMT to tell Google which one to use as well, but we’ll leave that for another day.
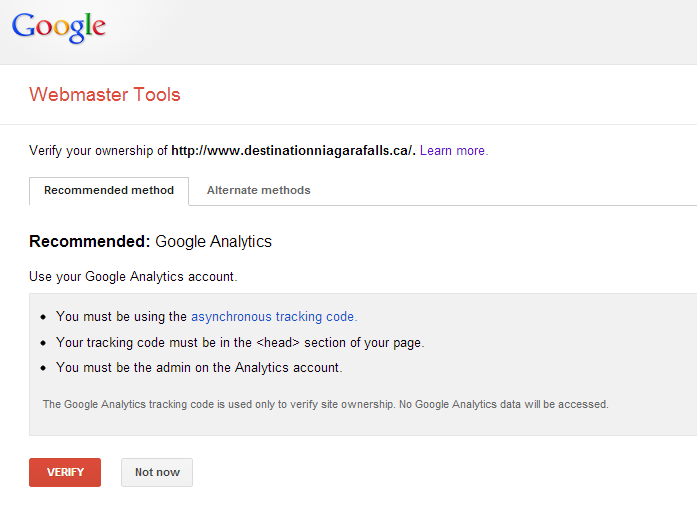
The next screen will offer a Recommended Method tab, and Alternate Methods tab. The recommended method will change based on your situation: if you already have GA set up and the Tracking Code on your site, then verifying through Google Analytics will be the recommended method. If it isn’t, just click the alternate methods tab and select the Use Google Analytics button. Whichever tab you are on, click the Verify button when ready.
You should be on the Congratulations screen with a green checkmark. GA and WMT both need you to put something on your site, but since we can use the GA one to make WMT work, but the WMT code won’t make GA work, it makes more sense to set up Analytics first. Then you only have to add one thing to your site.
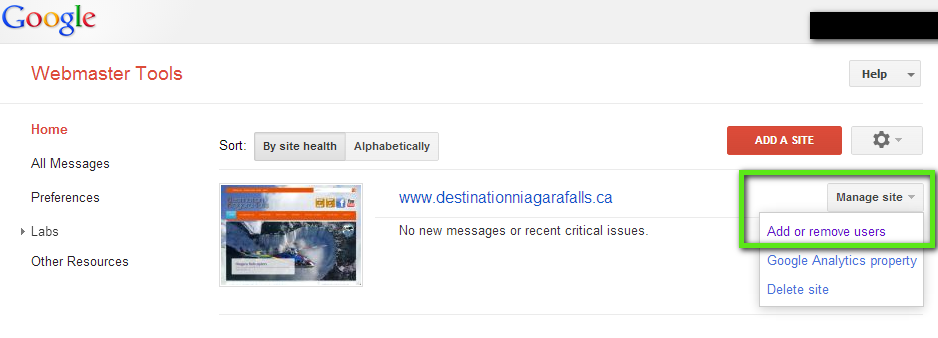
But we aren’t quite done. I almost forgot this myself (seriously I’m doing this along with you to make sure I don’t miss anything and get screen captures). There’s one more thing to do before we log out of our data only email account. Click where it says Webmaster Tools in red (yes it’s a link) twice, once to get to the home page for the given website, and again to get to the page shown below.
Adding Users to Webmaster Tools
From the WMT website selection page, click the Mange Site button to the right of the site we’re adding a user to to get the dropdown menu shown in the green square on the picture above. Select Add or remove users. On the next screen, click the red Add a New User button at the top right, or the blue Manage Site Owners link just to the left of it.
WMT permissions come in three flavors: Restricted Users can just look around; Full Users can change a few things about how Google sees your website (enough to do some damage), and Owners can do everything, including locking out other Owners and telling Google that you don’t want your site to show up in results anymore. Be careful who you give Full or Owner access to, and if they stop working for/with you, remove them from WMT promptly. Remove them immediately if it was an acrimonious split.
The Add a New User button will bring up a pretty self-explanatory pop-up window. Enter an email, select the permission level, and click Add. The Manage Site Owners link takes you to another screen. Click the Add an Owner button at the bottom, add an email, and click continue.
Integrating WMT and GA
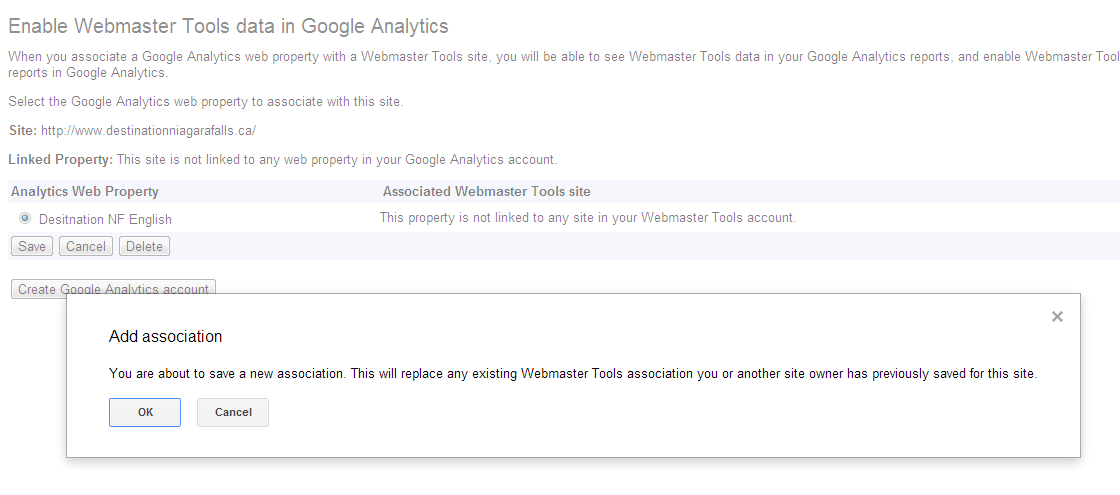
A lot of the data that WMT gathers is actually a lot easier and more useful to look at in Google Analytics, so you should always link them together. And it’s just a few clicks. Click the red Webmaster Tools text link at the top left to get the website selection page, and hit the Manage Site button again. This time, select Google Analytics Property. Click the radio button for the GA Web Property that gathers the data for the website we’re managing, then the Save button. Note that you can only have a website associated to one property, and doing this will cancel any previous links to other web properties in your Google Analytics account.
There’s a lot more that you could, and probably will, do with Google Analytics and Webmaster Tools, but all of that could arguably be called configuration or even customization. As far as basic setup, you’re done. Congratulations!
We’ll eventually look at good first steps to take now that things are set up, like that www vs non-www thing we mentioned above, and setting up conversions on your contact pages. For now, I’m ready for a break. Please leave a comment if you have any questions.


Thanks for writing such a good article on Google Webmaster tool and website setup for SEO. I am looking to try these techniques for my website birchi.in . Your tips are helpful for the person to make good blog marketing for their websites or blog. This content is so valuable and surely unique that people are happy and really helpful for them. there is no any other ways to get customers than Google indexing and Marketing and no any pressure from your side. Neither in the form of request nor hint or reminder in any ways.
Thanks